You may have heard other runners talking about Strava, the “social network for athletes” that’s become massively popular since its launch in 2009. If you don’t know how to get started, we’ll help you out. Soon, you’ll be tracking your training, uploading your runs, following other athletes, handing out kudos and comments, joining clubs and challenges, and maybe even creating your own routes in no time.
Strava takes many of the interaction-fostering features found in social media platforms such as Instagram and Twitter, and pairs it with activity tracking technology, such as those offered by RunKeeper or MapMyRun.
Like its peers, Strava is a free digital service accessible through both mobile applications and the web. Serious users can upgrade to the more advanced features for a monthly fee.
What tools will you need to use Strava?

With Strava, you’ll use some combination of three devices: a smartphone, computer, or a fitness tracker, the most common form of which is a GPS watch.
For smartphone use, you’ll need to download the free Strava app. Simply open your device’s app store (the App Store for iPhones and Google Play for Android devices), search for Strava, and download the app. On your computer, it’s even easier: Open your web browser and head to strava.com.
A fitness tracker involves a slightly more complicated setup process, but it is a smoother and more comprehensive tool in the long run. Keep reading for more detailed instructions on how to connect it to your Strava account. How to create a Strava account.
How to create a Strava account

When you reach the default screen on your phone or computer, you’ll need to create your Strava account. You can use your Facebook or Google account info, but if you’d rather keep things separate, perhaps for privacy or security reasons, you can start the account creation process fresh with your email. Follow the instructions—you’ll have to confirm your email or log in through the Facebook or Google platforms—and you’re in.
Remember, your profile and your account are two separate things, as with all similar online services. Your account encompasses everything on Strava related to you as an individual, while your profile is simply the information (name, photo, location, etc.) that other users will see on the platform.
How to customize your settings

Like every modern day decision when it comes to the internet, deciding how much to reveal on Strava—whether it’s allowing the company access to your information or deciding what your followers or any random user can see—is a tug of war between security and convenience. But the specific decisions are up to you.
As a new user, Strava will prompt you to immediately fill out some basic information for your profile: upload a photo, confirm your name, and provide your birthday and gender. Most Strava users have profile photos of them on a run or ride, but more privacy-inclined users often choose something more impersonal. These last two data points are mostly so Strava can put you on categorized leaderboards, but they’re not mandatory.
Skip the other initial prompts with as little action as possible. There’s nothing Strava will ask you up front that you won’t be able to change later, and it’s more worthwhile to make those decisions while learning to navigate the platform.
To do that on desktop, hover over your profile picture in the top corner, then click Settings. On mobile, tap your profile then click the gear icon in the top corner. Here you can fill in as many missing pieces as you’d like.
To further customize your profile, thoroughly browse all the settings options. Set what notifications you want, or add what shoes you wear (a note: you can’t add shoes on the app, only on desktop). Privacy and connected services and devices are covered in more detail below.
How to establish privacy settings

Within the myriad of customization options Strava offers, pay particular attention to Data Permissions and Privacy Controls, both subsections under Settings. In Data Permissions, you can decide whether to allow Strava to see personal health data your other devices might have. In Privacy Controls, you can:
• Decide who can see what from your account
• Set Privacy Zones, which create randomized dead zones that hide sensitive locations, such as your home, from the map of your run
• Opt out of including your run data in Strava’s aggregated heatmaps, which have caused controversy in the past
• Make your training log, where Strava keeps track of all your activities in detail, public or private

Strava offers three ways to record an activity: entering the data manually, recording your run with the Strava app on your phone as you run, or syncing the data recorded by a fitness tracker, likely a GPS watch.
Manual entry: On both platforms, choose the plus sign (upper right on desktop, for example) then select the manual entry option. From there, you can fill in as many details as you know, taken, for example, from a basic watch.
Strava app: Tap the Record tab. You can change any settings you need to, such as toggling auto-pause or audio cues on or off, then hit Start. The GPS on your smartphone will record the data from there, and once you’re done with your workout it will be uploaded to your activities when you hit save.
Fitness tracker: Unfortunately, this basic guide can’t delve into how to use your GPS watch. But assuming it’s one of the many mainstream brands Strava recognizes, you can link your Strava account with the watch so that activities recorded on it will automatically sync and upload to Strava. On desktop, you can choose the plus sign, then click Upload activity to upload an individual workout from your device. You’ll then see a list of available brands to connect with your Strava account. This connection will be saved in My Apps in your profile settings.
On the app, head to Settings, then Applications, Services and Devices (or look for “Link Other Services”), then Connect a device to Strava. This will automatically upload your workouts after you save the activity to your watch, making it that much easier for you to keep track of all of your runs on Strava.
How to join the Strava community

Now that you’ve explored the basic functions, it’s time to dive into what makes Strava unique: the social element. We suggest exploring these features on the mobile app—they’re built much more intuitively.
You can join a challenge, which will pit you virtually against thousands of other users to complete a task like running a certain number of kms in a month or feet of elevation in a week. Tap on Clubs, and you’ll see suggestions for Strava clubs near you (the main reason to include a location in your profile) Tap on any that interest you, then choose Join. Strava clubs act both as a way to connect with new friends and running peers you might never have met in person, as well as check out what your real life running buddies are up to.
Another way to see updates from your runner friends is by searching out their profiles to follow, after which you’ll see their activities in your feed, just like on Instagram or Twitter. Be sure to give them “kudos” on their runs, the Strava equivalent of a like. To find them, tap the symbol of two torsos in the upper right corner, and you’ll reach the Find Friends screen. You can scroll through lists of possibilities based on prior Strava connections, Facebook friends, or your phone’s contacts list.
Finally, once you start logging runs, you’ll start to notice your performance on certain “segments” are recorded. These are stretches of road or trail so popular with runners that Strava has created a leaderboard for them (or a user has created it as a segment). If you run the same routes often, you may start to notice certain names popping up again and again and you may find yourself competing for a top position on the leaderboard. Strava has two different leaderboards—one is based on the fastest times, while “Local Legends” ranks people who have run the segment the most times in the past 90 days.
How to access the advanced features
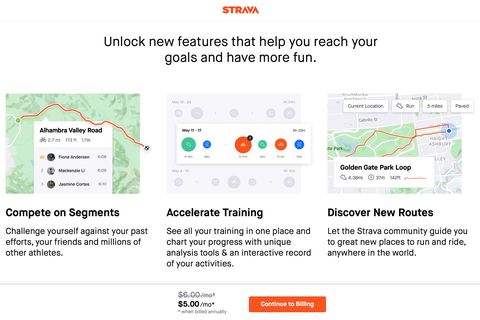
If you feel you’ve gotten the hang of using Strava, and it’s becoming a central part of your fitness lifestyle, you may want to consider some advanced features, accessed through a Strava subscription.
A subscription can be billed monthly—save $ by paying for a year all at once—reached through the Subscribe button at the top of your screen on desktop. A subscription will give you access to the company’s advanced route planning tool and use of the Beacon feature, which can allow friends and family to track you in real time.
Plus, you’ll be able to view advanced training metrics and analyze your past workout in more detail. You’ll also get a deeper look at segments, so you’ll see more than just the KOM and QOM—you can see all of your past efforts and track your progress against friends.